
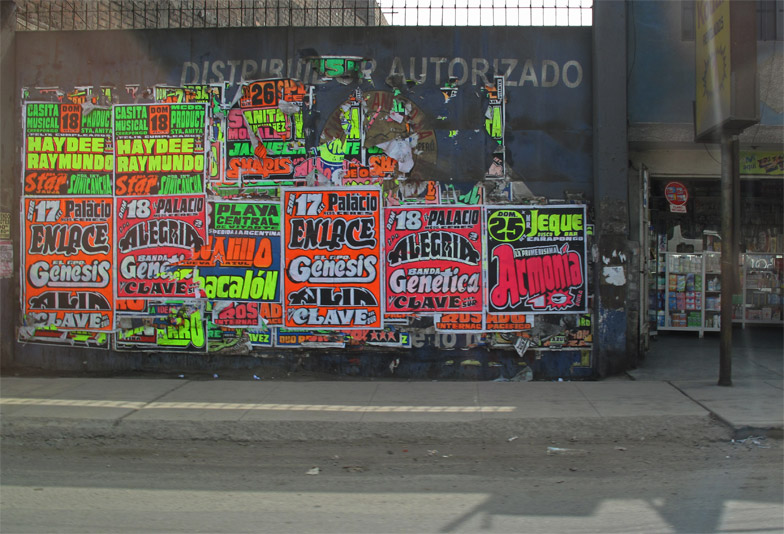
So apparently I saw lot's of these posters in La Paz (this ones are from Peru though) and my fascination for cheap and flashy graphics remains! It is a low-tech way of making eye-catching graphics without spending tons of money on printing and ad space (most of these posters were just pasted on street walls probably without permissionn, in Singapore, you'd get into a lot of trouble...trust me)
Colin Faulks, a lecturer in my alma mater LaSalle College of the Arts, showed me this website and INSTANTLY I knew the possibilities were endless for anyone with some paper, pen, a penknife/scissors, a silk-screen frame and paint.
This is my first try and the first colour I am doing. I need to wait for the screen and paint to dry to do my second colour but I am too excited for that so skerw it. In case you're not familiar with silk-screen here is an awesome explanation on it (thank you Wiki, what would we do without the internet?) And here is the shirt I am wearing, basically because there are about 6 different colours on this print, there were 6 different screens used. The tricky part comes when you have to align the screens one after the other because if they do not align, your print will not make sense you will just have squiggly lines all over.

Anyway, the following example is a lot simpler so don't worry, I did it within 15 minutes.
YOU WILL NEED:
1. PAPER TO DRAW ON- Butcher paper is recommended but I used normal photocopier A4 paper, you could even print a design you want to try silk-screening
2. PENCIL/DRAWING MATERIAL- to draw your design onto the paper
3. PENKNIFE/SCISSORS- Penknives get better shapes but if you're just doing big shapes I s'pose scissors would be fine too
4. FABRIC/PAPER TO PRINT ON
5. A HARD FLAT SURFACE TO PRINT ON
6. A SQUEEGEEEE AND A SILK SCREEN FRAME here is how you can make your own frame, I have not tried it but if you're brave please do it
STEPS
1. Draw your design on the paper and cutout the design. This 'negative' space would be where the paint would go through the screen and print on the fabric/paper

2. Pick your paint and place a dollop of it on one side, don't let the paint go through the cutout design yet

3. Using the squeegee, evenly spread the paint over the cutout design like so. Make sure there is no excess paint. You can repeat this process a few times but make sure the screen and the paper which you have cut-out do not move.

4. Remove frame and paper from the fabric/paper you printed on by lifting it up perpendicular to the table.
5. Let it dry and wash frame and squeegee. Ensure that you've scooped out the extra paint and you can put it back into the pot.

Here are the colours I picked today, can't wait to use the fluro pink man, why can't this screen dry off quicker.

That's it for part uno of young, broke and restless.
XX
No comments:
Post a Comment
TALK IS CHEAP.